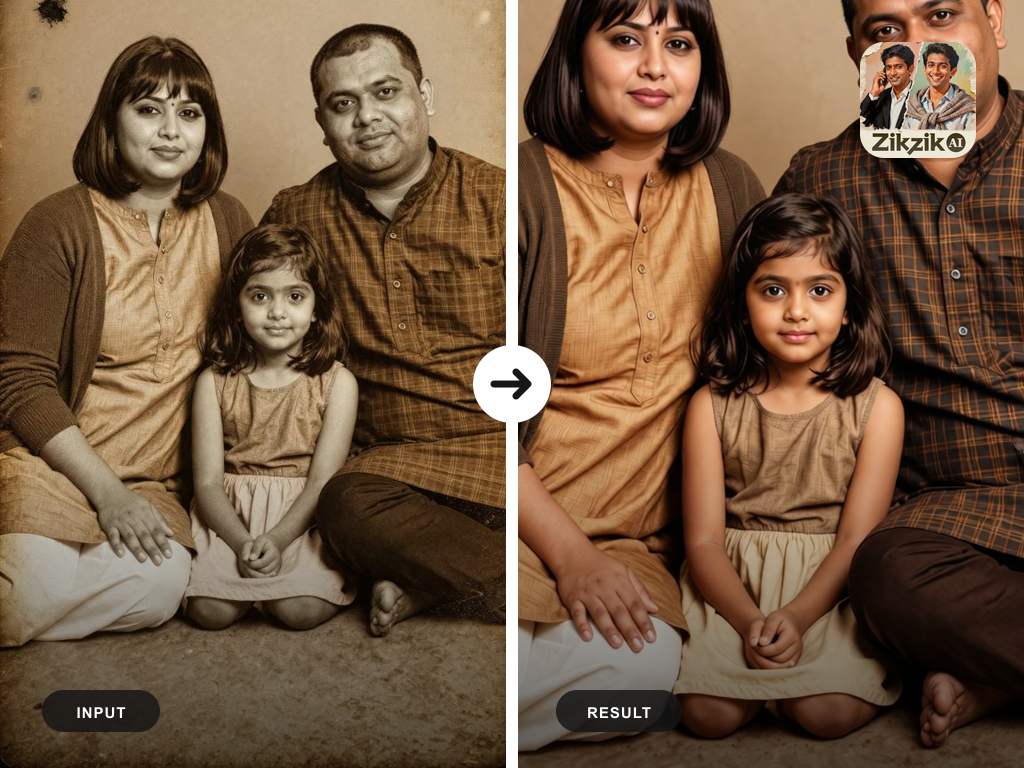
To restore an old photo with AI, first create the best digital copy you can, keep that scan untouched, repair dust and physical damage, correct tone, enhance faces gently, and compare every important detail with the original before you colourise or enlarge it. The order matters. AI can remove scratches, reduce blur, rebuild a torn background, and suggest missing detail. It cannot know exactly what an eye, necklace, sari border, handwritten name, or room looked like when that information is absent from the scan.
The safest goal is therefore not “make this look new.” It is make the photograph easier to see without changing the people or the evidence inside it.
Before getting into the manual workflow, Zikzik offers a faster, prompt-free route. Search its filter catalogue for an old-photo option, upload your image, and generate the result without writing a restoration prompt. The catalogue reviewed for this guide includes AI Restore Old Photo as well as creative vintage filters. Eligible users may see an introductory ₹0.01 trial. Keep the generated file separate from the original scan, because even a convincing result may rebuild facial detail or choose colours that the photograph cannot prove.
The safe old-photo restoration workflow
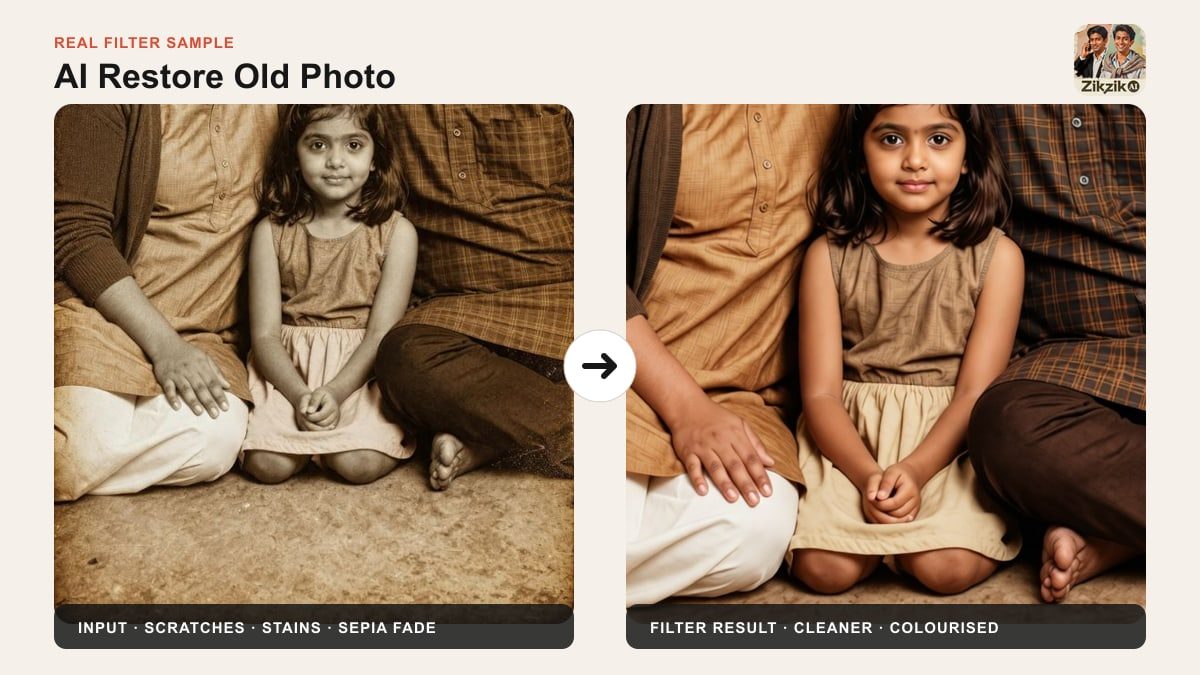
Official catalogue sample for the AI Restore Old Photo filter. It demonstrates the intended input-to-result workflow, not an independent benchmark or a guarantee for every upload.
In this sample, the filter removes the most visible surface damage, increases clarity, and produces a colour version while keeping the three-person composition recognisable. Look closely, however, and you can also see why verification matters: the result is smoother, sharper, and more specific than the damaged source. Some of that detail is inferred rather than recovered from visible pixels.
The practical sequence is:
- Capture the best source. Scan the print or photograph it carefully.
- Preserve an untouched master. Never overwrite the first high-quality digital copy.
- Repair visible damage. Remove dust, small scratches, stains, and tears before adding detail.
- Correct the image gently. Fix fading, contrast, noise, and blur in separate passes.
- Verify identity and history. Compare faces, clothing, jewellery, text, and background objects with the source.
- Export for a purpose. Keep an archive master, a restored master, and separate files for sharing or printing.
This workflow works whether you use a one-click old-photo restorer, a prompt-based AI editor, or desktop software with layers and healing tools. The buttons change; the preservation logic does not.
What AI photo restoration can and cannot do
AI photo restoration is a group of different operations that are often presented as one magic button. Understanding the difference helps you avoid asking a model to invent more than necessary.
| Operation | What it can do | What it cannot prove | Risk of changing the original |
|---|---|---|---|
| Dust and scratch removal | Replace small marks using nearby texture | What was under a deep scratch | Low when damage is away from faces and text |
| Tone correction | Recover contrast and reduce a faded colour cast | The exact original print density | Low |
| Denoising | Reduce scanner noise and distracting grain | Which texture is authentic film grain | Low to medium |
| Sharpening and upscaling | Make edges and small faces easier to view | Detail that was never captured | Medium |
| Face enhancement | Infer eyes, skin texture, hair, and facial edges | A person's exact appearance | Medium to high |
| Inpainting | Fill tears, holes, and missing background areas | The true missing object or body part | High |
| Colourisation | Suggest plausible colours | The historical colour of clothing, walls, vehicles, or skin under the original lighting | Interpretive |
The safest edits are usually global tone corrections and small repairs surrounded by reliable pixels. Risk rises when damage crosses an eye, mouth, hand, piece of jewellery, uniform insignia, written name, or another identity-bearing feature.
Step 1: Handle and clean the physical photo carefully
Do not begin with AI if the physical print is still dusty, curled, damp, mouldy, stuck to glass, or flaking. Software cannot undo new damage caused while handling the original.
Use clean, dry hands and hold the photo by the edges. Remove loose surface dust with a very soft, clean brush or air blower. Do not apply water, household cleaner, oil, sanitiser, or adhesive tape. Adobe's India restoration guidance specifically recommends dry cleaning with a soft brush or microfibre cloth and warns against water or cleaning solutions.
Stop and consult a photograph conservator when:
- the emulsion is lifting or powdering;
- the print is wet, mouldy, or stuck to another surface;
- a glass plate, negative, or album page is brittle;
- the original has handwriting, paint, or hand colouring that may detach;
- the item is historically valuable or irreplaceable.
Digital repair is useful after safe capture. It is not a substitute for conserving a failing physical object.
Step 2: Scan at high resolution, even if you only need WhatsApp
A restoration can only work with the information in the file. A dark, angled phone snapshot with glare forces the model to solve capture problems before it reaches the actual damage.
For a small printed photograph, 600 DPI is a practical starting point. Adobe's India guide recommends a minimum 600 DPI scan for old photos. Scan in colour even when the picture appears black and white or sepia; the colour channels may preserve faint stains, ink, paper tone, and retouching marks that help later repair.
Save the first scan as TIFF or PNG when storage allows. The Library of Congress recommends keeping a TIFF master and using a JPEG as a working or sharing copy because JPEG compression discards some captured data. Do not crop, rotate, sharpen, denoise, or colour-correct the master file.
If you only have a phone
A modern phone can make a workable source if you control the setup:
- place the photo flat on a neutral surface;
- use bright, indirect light from both sides;
- turn off the flash;
- hold the phone parallel to the print;
- fill the frame but include all four edges;
- avoid digital zoom and portrait mode;
- take several frames and keep the sharpest one;
- check for glare over dark hair, glasses, and glossy clothing.
If the photo is behind glass and cannot be removed safely, change the light angle instead of forcing the frame open.
Step 3: Preserve the master and make a working copy
Before opening any AI tool, duplicate the scan. Use a naming system that records what each file is:
1978-delhi-wedding-original-scan.tif1978-delhi-wedding-restored-v1.png1978-delhi-wedding-colourised-interpretation-v1.png1978-delhi-wedding-whatsapp.jpg
Do not label a colourised or generatively reconstructed image simply as “original.” Future relatives may not know which details came from the photograph and which came from software.
Step 4: Diagnose the damage before choosing a tool
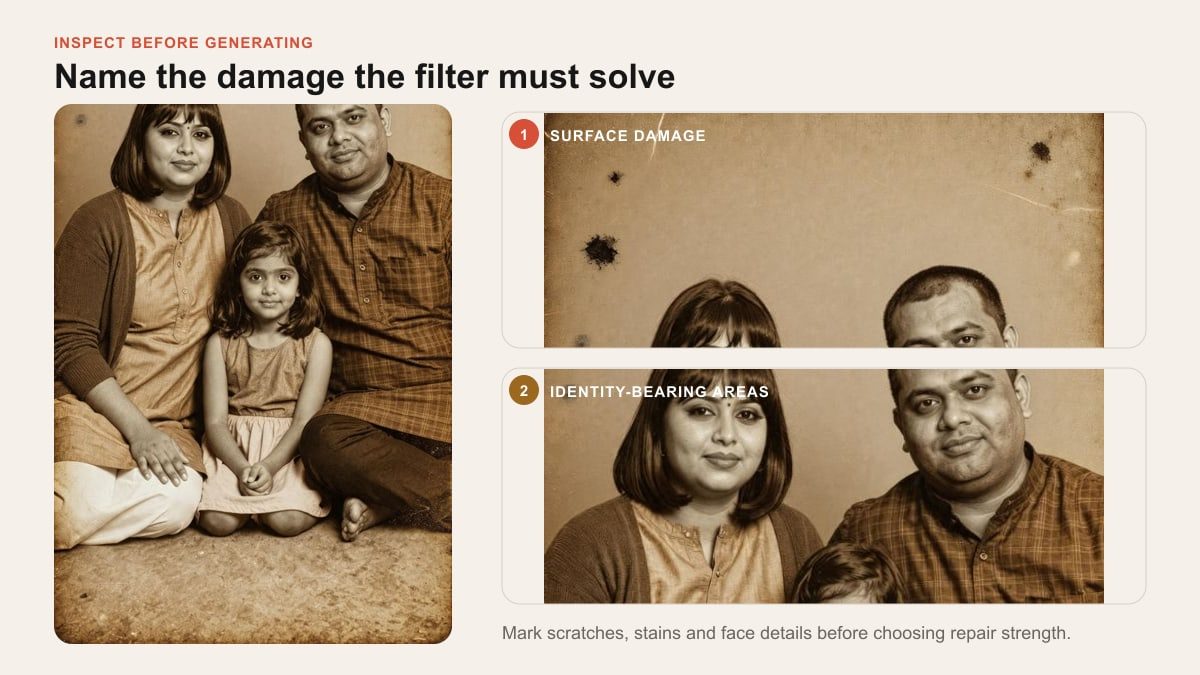
Official catalogue input sample. The surface marks near the border are safer repair targets than uncertain facial, clothing, or jewellery details.
Zoom in and list the problems before editing. A photo may have several:
- surface dust and isolated white or black spots;
- thin scratches or crease lines;
- faded blacks and weak contrast;
- yellow, red, blue, or green colour casts;
- scanner noise or heavy paper texture;
- motion blur or missed focus;
- large tears and missing corners;
- damage crossing a face, hand, sign, or garment;
- a small face that occupies very few pixels;
- handwriting or a studio stamp that must remain legible.
Match the tool to the damage. A one-tap restorer is suitable for common fading and light scratches. A prompt-based editor is more useful when you need to state what must remain unchanged. A layer-based editor gives the most control over local repairs. A severely damaged face may require a professional retoucher working from other verified photographs of the same person.
Step 5: Remove dust, scratches, and tears first
Physical damage should be repaired before sharpening and colourisation. Otherwise the next tool may sharpen a scratch into a strong line or assign a colour to a stain.
Start with the gentlest repair setting. Compare the result at 100% zoom and at normal viewing size. If a scratch is in a plain wall or sky, automatic removal is usually low risk. If it crosses an eyebrow, eye, mouth, bindi, turban edge, necklace, printed date, or handwritten name, repair only that region and inspect it closely.
For large tears, process one area at a time. Asking a model to “completely reconstruct this badly damaged photo” gives it permission to redesign the entire image. A better instruction identifies the damaged region and locks everything else.
Step 6: Correct fading, contrast, and noise
Once the physical marks are under control, restore the photograph's tonal structure. Adjust black point, white point, midtones, and colour balance before aggressive sharpening. The aim is to reveal existing information, not make an old print look like a modern HDR photograph.
Watch these common failure signs:
- black hair becomes a solid shape without strands;
- white clothing loses embroidery or fabric folds;
- skin becomes smooth plastic;
- shadows around eyes become makeup-like;
- paper grain disappears from one area but remains elsewhere;
- a sepia print becomes neutral black and white even though the warm tone was part of the object;
- contrast removes faint people or objects in the background.
Apply noise reduction sparingly. Film grain, print texture, scanner noise, and damage are different things, even if a model treats them as one pattern.
Step 7: Enhance faces last and use the lowest useful strength
Face enhancement is where an impressive restoration most easily becomes a different person. The software uses learned patterns to infer clear eyes, eyelashes, skin, teeth, hair, and facial edges. MyHeritage's own documentation describes enhancement as a simulation and warns that results may be inaccurate or distorted. That is the right mental model for any AI face enhancer.
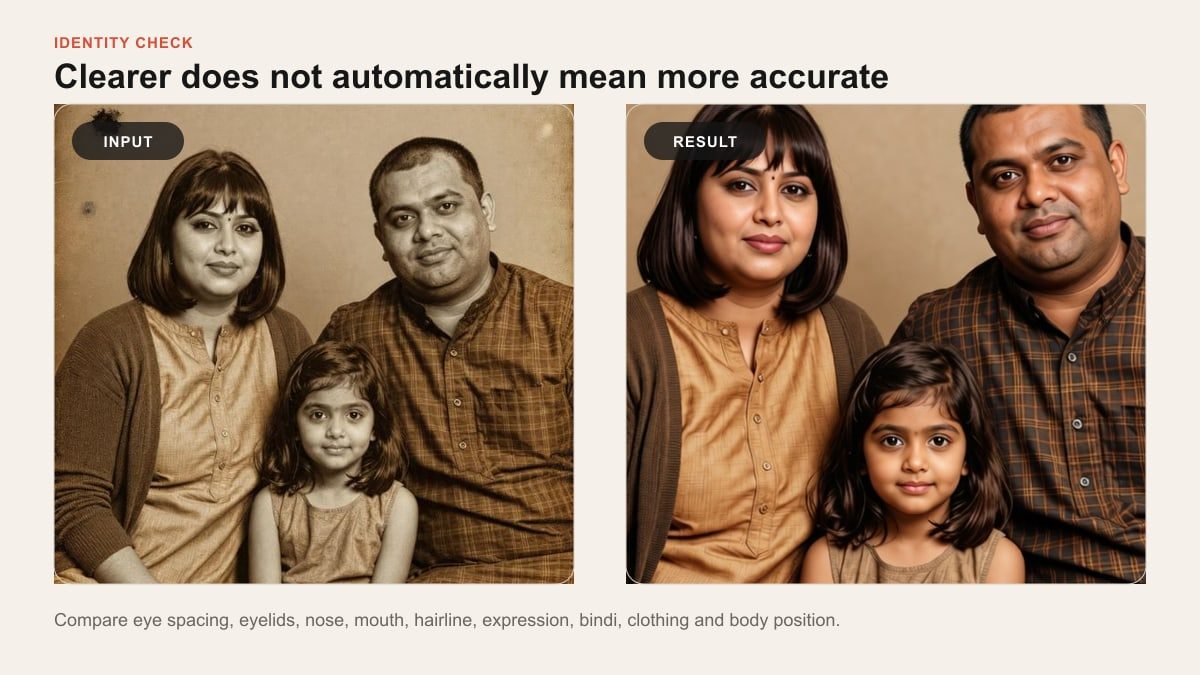
Official filter sample. Review the input and result at full size and normal viewing size before accepting a restoration.
Compare the original and restoration for:
- distance and angle between the eyes;
- eyelid shape, eyebrow thickness, and gaze direction;
- width of the nose and shape of the nostrils;
- mouth width, lip shape, teeth, moustache, and beard line;
- jaw, ears, hairline, and face width;
- age lines, scars, moles, and other known features;
- expression, especially a restrained smile or serious pose;
- head position relative to the body.
If the source face is only a few pixels wide, the honest result may remain soft. A sharp invented face is not a successful restoration.
Step 8: Use a prompt that locks identity and composition
Not every restoration tool accepts text. When it does, the prompt should describe the repair and the invariants: the things that must not change.
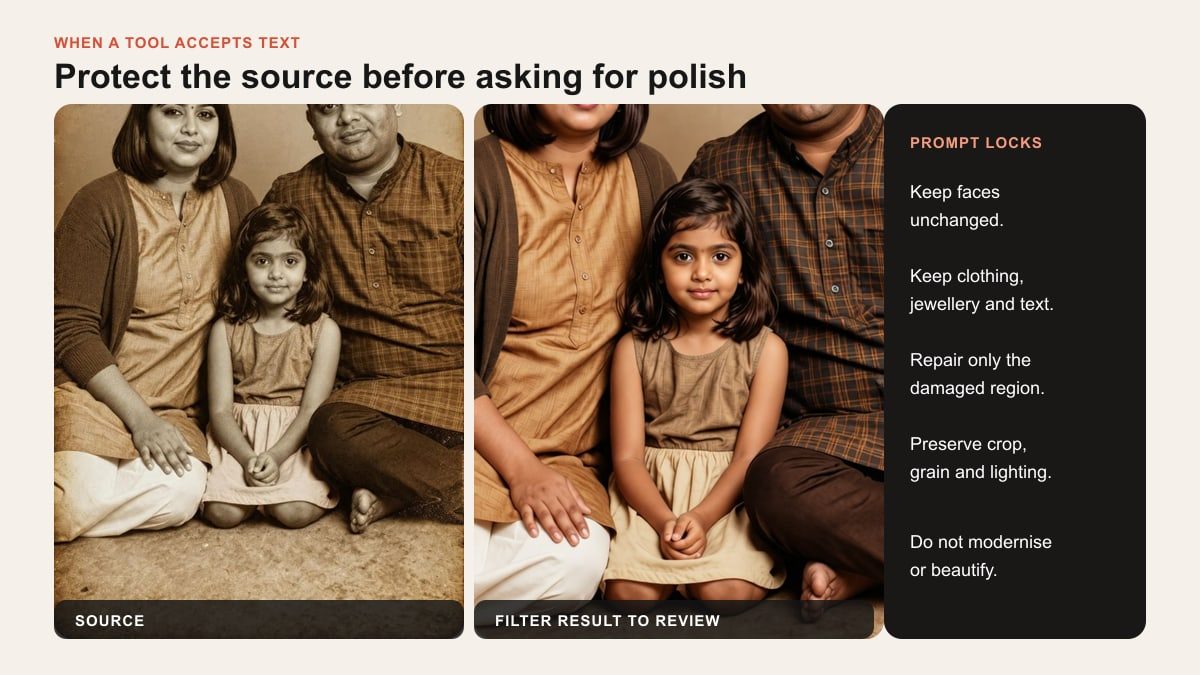
The photo panels are from the official filter sample. When a tool accepts text, a good restoration prompt spends more words protecting the source than making it dramatic.
Prompt for gentle black-and-white restoration
Restore this old black-and-white photograph conservatively. Remove dust, small scratches, stains, and crease marks. Correct fading and contrast while preserving natural film grain. Keep every person's face, age, expression, pose, body shape, clothing, jewellery, hairstyle, background, crop, and camera angle unchanged. Do not modernise the scene, beautify faces, add objects, remove people, or invent text. Use restrained sharpening and return one repaired black-and-white copy at the original aspect ratio.
Prompt for a faded colour photograph
Repair this faded colour photograph while preserving the original scene. Remove dust and small physical damage, neutralise the colour cast, recover moderate contrast, and reduce noise gently. Keep skin tones natural and keep every face, expression, garment, jewellery item, religious mark, background object, and written detail unchanged. Do not replace the lighting, modernise colours, smooth skin, or create new details. Preserve the original crop and period character.
Prompt for a tear or missing background area
Repair only the torn area in [describe the exact location]. Reconstruct it from the nearest intact background texture. Do not alter any face, hand, clothing edge, jewellery, text, furniture, or object outside the selected damage. Preserve the original grain, lighting, perspective, crop, and aspect ratio. If the missing area cannot be inferred reliably, leave a subtle repaired texture rather than inventing a new person or object.
Prompt for cautious colourisation
Colourise a duplicate of this approved black-and-white restoration. Keep all geometry, faces, expressions, clothing patterns, jewellery, text, background objects, crop, and grain unchanged. Use restrained, period-plausible colours and natural Indian skin tones. Do not assume specific colours for saris, turbans, uniforms, wedding garlands, walls, vehicles, or jewellery when the photograph provides no evidence. Return the result as a clearly labelled colourised interpretation.
Avoid prompts such as “make it beautiful,” “make everyone younger,” “add realistic details,” or “turn it into a modern 4K photo.” Those instructions encourage the model to redesign the image rather than restore it.
Step 9: Treat colourisation as an interpretation
Black-and-white pixels encode brightness, not the original hue. Two different saris can produce the same grey value. A model may generate a plausible red, green, blue, or gold garment, but plausibility is not evidence.
Before colourising, ask relatives whether they remember the clothing, wall colour, vehicle, uniform, or event decorations. Look for another photo from the same wedding, studio, school, military unit, or family home. If no evidence exists, keep the monochrome restoration as the archival version and label the colour version as an interpretation.
For Indian family photographs, inspect:
- skin tone across faces, hands, and exposed arms;
- sari drape, blouse shape, dhoti or mundu folds, shawls, and turbans;
- bindi, sindoor, tilak, mehndi, sacred threads, and regional jewellery;
- school, police, railway, military, or workplace uniforms;
- wedding garlands, sehra, veils, flowers, and ceremonial objects;
- signs in Devanagari, Bengali, Tamil, Telugu, Urdu, Gujarati, Gurmukhi, Malayalam, Kannada, Odia, or English;
- flags, badges, number plates, calendars, and shop names;
- studio backdrops and hand-painted colour already present on the print.
These details are not decorative. They may identify a region, community, profession, event, or person.
Step 10: Run a two-distance fidelity check
First inspect the photo at 100% zoom. This reveals invented eyelashes, broken jewellery, repeated texture, fake writing, doubled fingers, and repair seams. Then view it at the size a family member will actually see. This catches a different problem: a face may be technically detailed but no longer feel like the person.
Ask someone who knew the subject to review the image without showing them your preferred version first. Useful questions are concrete:
- Does this still look like the same person?
- Is the expression the same?
- Has any person or object disappeared?
- Are clothing and jewellery shapes intact?
- Is any readable text changed?
- Does the image look over-sharpened or artificially smooth?
If a repair fails, return to the last approved version and change one variable. Reduce face enhancement, narrow the repair area, remove colourisation, or ask for less sharpening. Re-running the same broad prompt repeatedly can create new differences without solving the original one.
Step 11: Export an archive master, a share copy, and a print copy
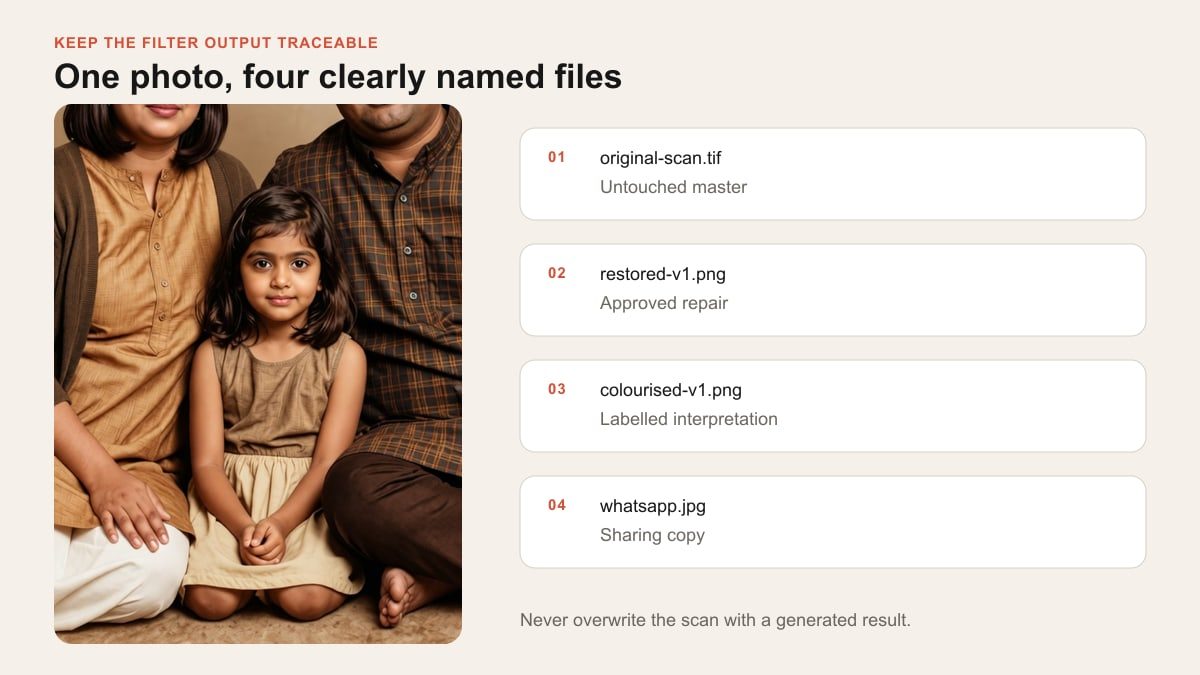
The photo is an official filter result. One generated JPEG is convenient, but it is not a durable family archive.
Keep at least four logical versions:
- Untouched master: the best original scan, preferably TIFF or PNG.
- Restored master: the approved repair at full resolution, preferably TIFF or PNG.
- Share copy: a high-quality JPEG sized for email, WhatsApp, or a family group.
- Print copy: full resolution, cropped for the exact frame or paper size.
Store one backup away from the phone or computer holding the working files. Keep a small text note with names, relationships, approximate date, place, event, photographer or studio if known, who identified the people, and which edits were performed.
What to do with the photo after restoration
A faithful restoration should remain easy to distinguish from a creative remake. The supplied catalogue search returned both kinds of filters. AI Restore Old Photo is presented as a repair and colourisation workflow. My Old Photos with You and Subway Retro Photography deliberately redesign the source into a period-style portrait. Those creative filters can be useful for a tribute, anniversary video, profile portrait, invitation, or new family artwork, but their outputs should not replace the restored historical copy.
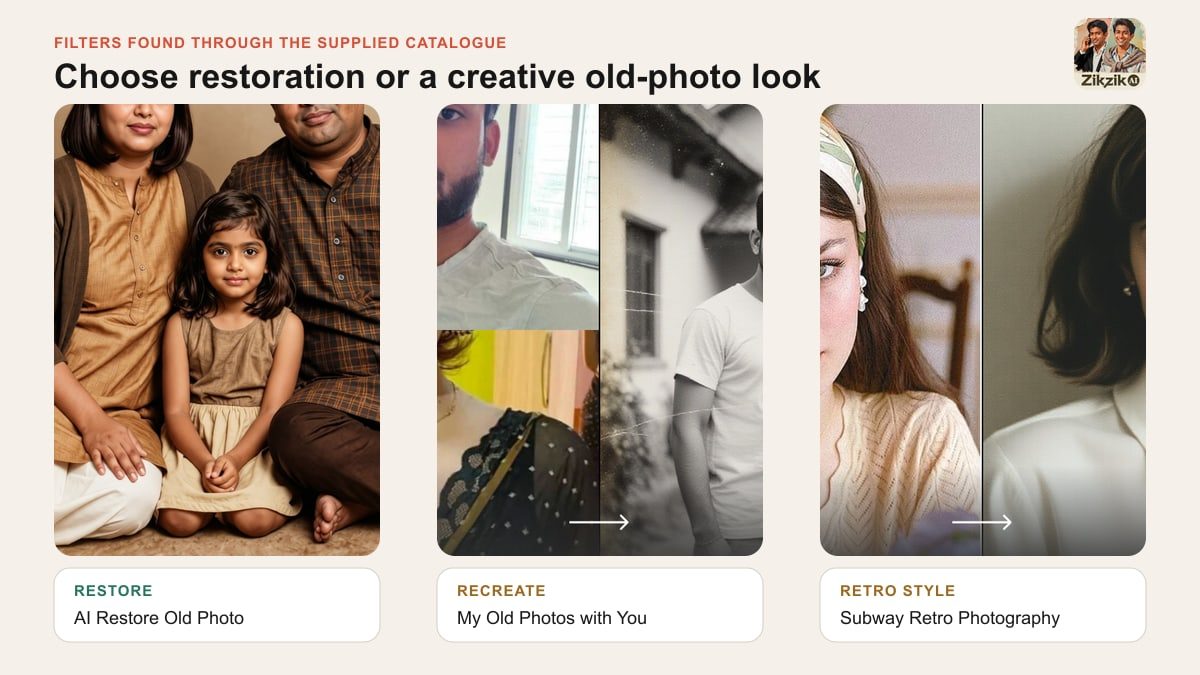
Source: current filter assets selected through the supplied catalogue. The first card is a restoration-style result; the other two are creative transformations that visibly change people, clothing, composition, or setting.
With Zikzik, the filter workflow does not require prompt writing:
- Keep the untouched scan and restored master outside the creative workflow.
- Search for a restoration filter when the goal is repair, or a vintage filter when the goal is a new look.
- Upload the working copy or the required family portraits.
- Generate the photo or short video and compare it with the source.
- Save restoration, colourised interpretation, and creative recreation as separately labelled files.
Zikzik currently promotes an introductory trial from ₹0.01 for eligible users. Commercial use is supported under the product information supplied for this guide, but check the terms shown for the selected filter and output before using it for client work, advertising, merchandise, or resale.
Create a new family photo or video with Zikzik
Common AI restoration mistakes
Restoring from a WhatsApp forward
Messaging apps often compress images. Ask for the original scan or the largest available file before repairing a forwarded copy.
Sharpening before removing scratches
Sharpening can turn damage into a strong edge that later tools preserve. Clean first, then correct tone, then sharpen.
Running maximum face enhancement
More facial detail can mean more invented detail. Use the lowest setting that improves readability while preserving identity.
Colourising the only restored copy
Keep an approved monochrome restoration. Colourisation should be a separate derivative.
Cropping out borders, stamps, and handwriting
The border, studio mark, date, and notes may be part of the historical record. Preserve them in the master even if you crop a sharing version.
Treating a convincing output as proof
AI optimises for visual plausibility. It does not authenticate the person, date, location, clothing colour, or event.
When AI is enough and when to hire a professional
AI is often enough for a viewing copy when the photo has dust, mild scratches, fading, low contrast, or moderate blur and the important faces remain visible. It is also useful for triage: processing several family scans to decide which ones deserve manual attention.
Use an experienced retoucher or conservator when damage removes an eye or mouth, a face must be reconstructed from other verified references, a torn print needs physical treatment, text has legal or genealogical importance, or the image will be published as historical evidence. A professional can document each intervention and leave uncertain areas unresolved rather than hiding uncertainty behind a plausible generation.
Frequently asked questions
Can AI fully restore a badly damaged old photo?
It can create a visually complete version, but the more information that is missing, the more the result depends on inference. Large missing facial areas, hands, text, and culturally specific details need careful review and may require a professional.
Is it better to scan an old photo in colour or black and white?
Scan in colour. Even a monochrome print contains paper tone, stains, ink, hand colouring, and channel differences that may help repair. You can create a black-and-white derivative later.
What resolution should I use to scan old family photos?
For typical small prints, 600 DPI is a practical starting point. Very small photographs, negatives, slides, or prints intended for large reproduction may need a different capture method. Resolution cannot compensate for poor focus, glare, or physical movement during capture.
Can I restore an old photo from my phone?
Yes, if the phone image is sharp, evenly lit, square to the print, and free of glare. A flatbed scan is usually easier to archive and gives more consistent detail.
Should I colourise an old black-and-white photo?
Colourise a duplicate if it helps family members connect with the scene, but keep the approved monochrome restoration and label the colour version as an interpretation. Ask relatives for known colours before letting the model guess.
How do I stop AI from changing a face?
Use the highest-quality source, repair non-facial damage first, keep face enhancement low, state that facial geometry and expression must remain unchanged, process only the damaged area, and compare the result with the original at two viewing sizes.
Can I use a restored photo commercially?
Restoration does not automatically give you rights to the underlying photograph or the people, artwork, trademarks, and other material in it. Check ownership, consent, the tool's current terms, and the intended use. A tool may permit commercial outputs while the source photograph remains protected.
Final checklist
Before calling the restoration finished, confirm that you have:
- kept the untouched master scan;
- repaired damage before sharpening or colourising;
- preserved the original crop and aspect ratio;
- compared every face with the source;
- checked clothing, jewellery, religious marks, uniforms, and text;
- kept a monochrome version before optional colourisation;
- labelled reconstructed or colourised versions accurately;
- exported separate archive, sharing, and print files;
- recorded names, date, place, and edit history;
- backed up the files in another location.
AI can make a faded photograph easier to see and share. The best restoration still respects what the image does not reveal. Preserve the source, make the smallest useful change, and let family knowledge outrank a model's confident guess.